Showing posts with label scrapbooking. Show all posts
Block Basics
Take unfinished blocks and use pictures, paint or embellishments for a display! 40% off regular prices of blocks until October 28th, 2012. (Regular prices from 50 cents - $4.99)
Labels:
gift,
home decor,
scrapbooking
12 Days of Christmas by My Mind's Eye
This giveaway is now closed! Thank you for playing along! Our winner picked via Random.org is
MendiOctober 19, 2012 10:41 AM
Loved this collection! :) It is time to celebrate the weekend again with another giveaway! This Weekend Giveaway, we have My Mind's Eye 12 Day's of Christmas collection to give to one lucky winner! This prize pack includes 17 double sided cardstock paper, 1 package of decorative brads, trims, and clear stamps! That is over $40 of Christmas supplies!
To enter to win, you can...
1. Comment here with your email address in the comment so I can get in touch with you. Or if it is in your blogger profile, that is ok. Make sure to type it email(at)address(dot)com. Thank you.
2. Share our giveaway via Facebook by clicking "share" on our Facebook post, then come back here and tell us that you did.
3. Share our giveaway via Twitter, then come back here and tell us that you did.
4. Pin our giveaway via Pinterest, then come back and tell us that you did.
The winner will be picked via Random.org on October 22nd!
*We ship in the US only thank you.
Labels:
scrapbooking,
weekend giveaway
Heidi Swapp Memory File Class by Jennifer Evans
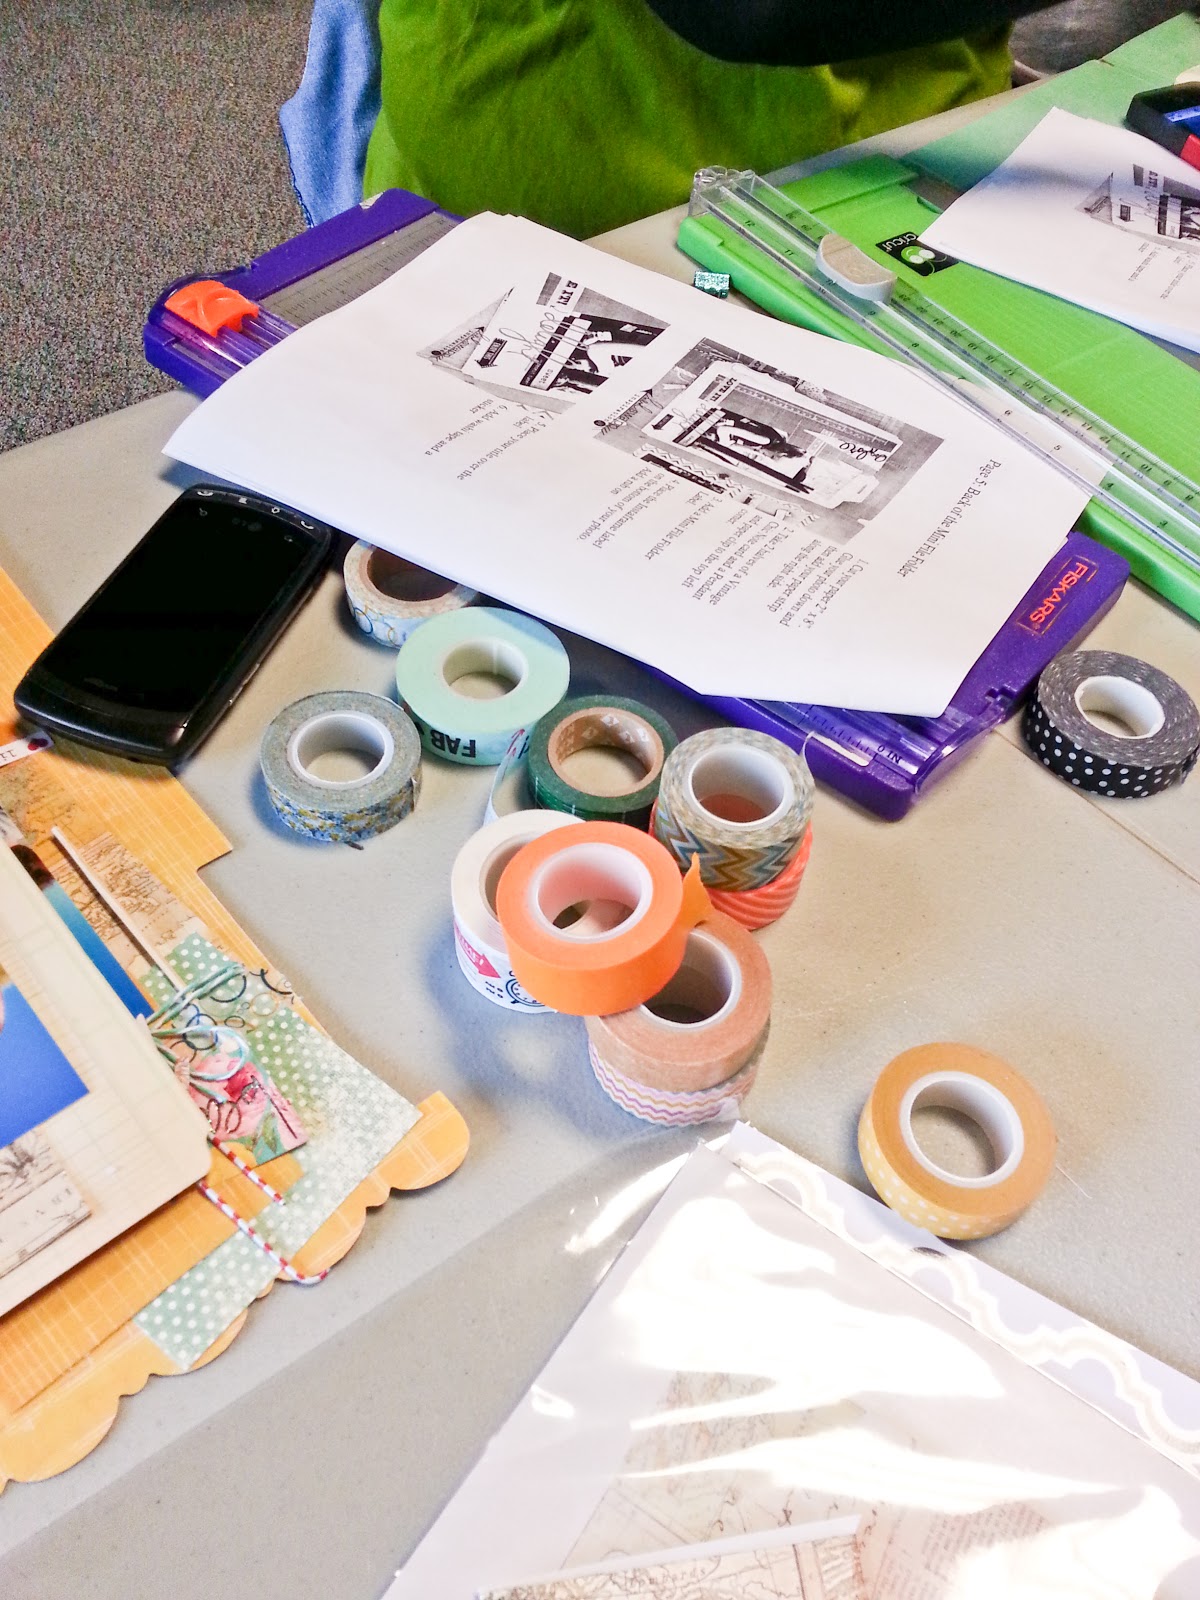
Last Saturday I had the privilege to teach a Heidi Swapp Memory File class. Remember the Memory File pictured below? Well, this was the sample for this class. I knew we needed coffee to start us off on the right foot, so I stopped at Starbucks first. ;)
Unfortunately, the creamer tipped in the car and ruined all the coffee supplies. So, we had to stir the extra creamer I bought with our pinkies. ;)
I got to get a chance to spend time with some ladies that are come to our local Scrapbook Club.
Then, I got to meet some new friends that I only see via Instagram and online. Some traveled pretty far to visit! I felt super honored to meet them "in person!"
I love how each member personalized their file. Not one Memory File looked the same!
My dear friend and Craft Warehouse Design Team Member, Michelle, came to the class along with her mom! Can you believe her mom came from the Bay Area to spend time with her daughter and took the class with her? Sweet, right?!
I love how some came totally prepared with rolls of washi tape... just in case. ;)
We were taking photos with my phone and I had to have a picture taken of my dear twin sister, Becca. She is so amazing. She helped set up the class, break it down, and during class made sure that everyone was helped. Love you sis!
Craft Warehouse rented out the empty building next door so we could have room to do the class. We had plenty of room to work, talk, and play!
Thank you so much Craft Warehouse and to all those that came! It was a great time and I look forward to doing it again!
Labels:
events,
scrapbooking
Pebbles Inc. Walnut Grove
1&2: Pebbles Inc. Walnut Grove Collection
3. Kim Jeffress for Pebbles Inc.
4&5: Pebbles Inc Walnut Collection
Labels:
scrapbooking,
trend watch
Authentique's Enchanted Boo Holiday Decor by Guest Designer SaLee Phillips
This was a fun, quick and pretty simple project to make. These letters can be hung on the wall, adhered to piece of wood, or on a deco mesh wreath! Lots of options with these MDF letters. 1. Paint the letters black with the acrylic paint
2. Coat each letter with Mod Podge and cover with a sheet of decorative paper
3. Using an exacto knife, cut out the letter (you can trace the letter on the paper and cut with scissors if you prefer, but I like to to use a craft knife for a more precision cut).
4. Using Tim Holtz distressed ink in Black Soot and the applicator tool, distress the edges of the letters with the ink to give it more depth. Please add these two items to the supply list).
5. Once the paper is adhered to the letter, coat with Mod Podge and sprinkle with Martha Stewart Glow in the Dark Glitter (add this item to the supply list)
6. Letter "B": stick on the Jolee's haunted tree, crows and moon; hot glue the feathers to the top left corner; put sticker on metal cameo (this was something I had left over) but when I did a workshop, I cut out a cameo shape from a Cricut cartridge and used Stampendous Glitter Glass on it---it turned out even better than the metal one I used; add the October 31st sticker to the tree.
7. Letter "O": wrap some spider webbing around the letter; hot glue the stickers on; stamp was the My Minds Eye new Halloween stamp which I stamped with black and put Glossy Accent Crackle on (another sticker from the collection can also be used in place of the stamp); I also put the crackle on the big sticker; stick on a few spiders from Jolees and black flowers from Petaloo (add to list of products)
8. Letter "O": Glossy Accent the stickers; used the Alcohol Ink patina (black and ocher) to the metal skulls then hung them on the O with a small chain; spray some black Mister Hueys on the gauze and place under the sticker---another GREAT option is using black tulle or use both for more fun!
Clear Fall Pails
Designed and Created by Sarah Owens for Craft Warehouse
Create your own fall decor using clear pails available at your local Craft Warehouse! Here are some creative ideas to add to your own clear pail.
- Paint wooden candle sticks as a base
- Add a Canvas Corp flower and a vinyl on the front
- Use a diecut and chalkboard vinyl to add a note or letter
- Create a fall scene inside
- Hang mini buckets from ribbon or twine with a fall message
- Place pattern paper inside for an easy way to change out the look at the end of the season!
Labels:
holidays,
home decor,
scrapbooking
American Crafts' Dear Lizzy 5th and Frolic
1-4: American Crafts' 5th and Frolic Collection by Dear Lizzy
new and now available at Craft Warehouse
Labels:
american crafts,
scrapbooking,
trend watch
American Crafts Weekend Giveaway
This giveaway is now closed. The winner picked via Random.org is:
Shared on FB :D
Yeah! It is time to celebrate the weekend again with another giveaway! This Weekend Giveaway, we have American Crafts' SOHO Garden collection to give to one lucky winner! This prize pack includes 12 double sided paper, 2 packages of Boho Thickers (in black and gold glitter foam alphas), Bleeker Street Fabric Stickers, 5 1 yard ribbon set, Garden District Acrylic Stamp Set, Hudson Square Die Cut Set, Midtown Layered Chipboard Sticker Set, Mercer Street Decorative Tags, and 2 packages of Chelsea Remarks Alpha Stickers (in green and orange). That is over $50 in beautiful supplies!To enter to win, you can...
1. Comment here with your email address in the comment so I can get in touch with you. Or if it is in your blogger profile, that is ok. Make sure to type it email(at)address(dot)com. Thank you.
2. Share our giveaway via Facebook by clicking "share" on our Facebook post, then come back here and tell us that you did.
3. Share our giveaway via Twitter, then come back here and tell us that you did.
4. Pin our giveaway via Pinterest, then come back and tell us that you did.
The winner will be picked via Random.org on October 8th!
*We ship in the US only thank you.
Labels:
scrapbooking,
weekend giveaway
Halloween Party by Guest Designer Michelle Price
I'm excited to share this fun Halloween idea with you. I'm known in my family as the Halloween Queen, a title I wear proudly, so this project is right up my alley. I received the adorable Haunted Manor line from Doodlebug Design and knew immediatley it would make the perfect pieces for a Little Witch Party. I designed a Good Little Witch Party, for good little girls who don't like to be scared.
The cupcake toppers and Halloween banner came together quickly using some mini doodle-pops, banner stickers and twine.
No party would be complete without a goodie bag to take home. These cute bags can be put together as simply or as detailed as you choose.
Supplies:
4 1/2 x 12 sheet patterned paper
sticker sheet of sentiments and images
Plastic or Glassine bag-twine-button
2. Fold your piece with the outsides together at the 6” score line. Now fold the flaps back together at the 5 ½” and 6 ½” score lines so the insides are together. This creates an accordion fold that will make your bag stand up on it’s own.
3. Fold over the top of the plastic/glassine bag and sandwich it between the two flaps of your cardstock holder. The folded top edge of the glassine bag will be flush against the top of the cardstock. Place your embellishment paper on the front of the cardstock holder.
4. Pinching all three layers together tightly, punch two small holes in the top center of the treat bag holder. Your punched holes will go through all three layers. Thread a piece of twine through the holes and wrap it through the hole twice. Finish with a secure knot. Thread your two twine tails through a button and finish by tying a bow over the top of the button. The bag is now securely attached to the cardstock holder.
5. Finish off by adding stickers and diecuts to the front of the treat holder.
6. Bonus Tip: When you wrap a package, you run your ribbon along the edge of your scissor blade to make it curl. You can do the same thing with your twine tails to give them a slightly curled look. Follow the same procedure, but just do it very lightly so you do not break the twine.
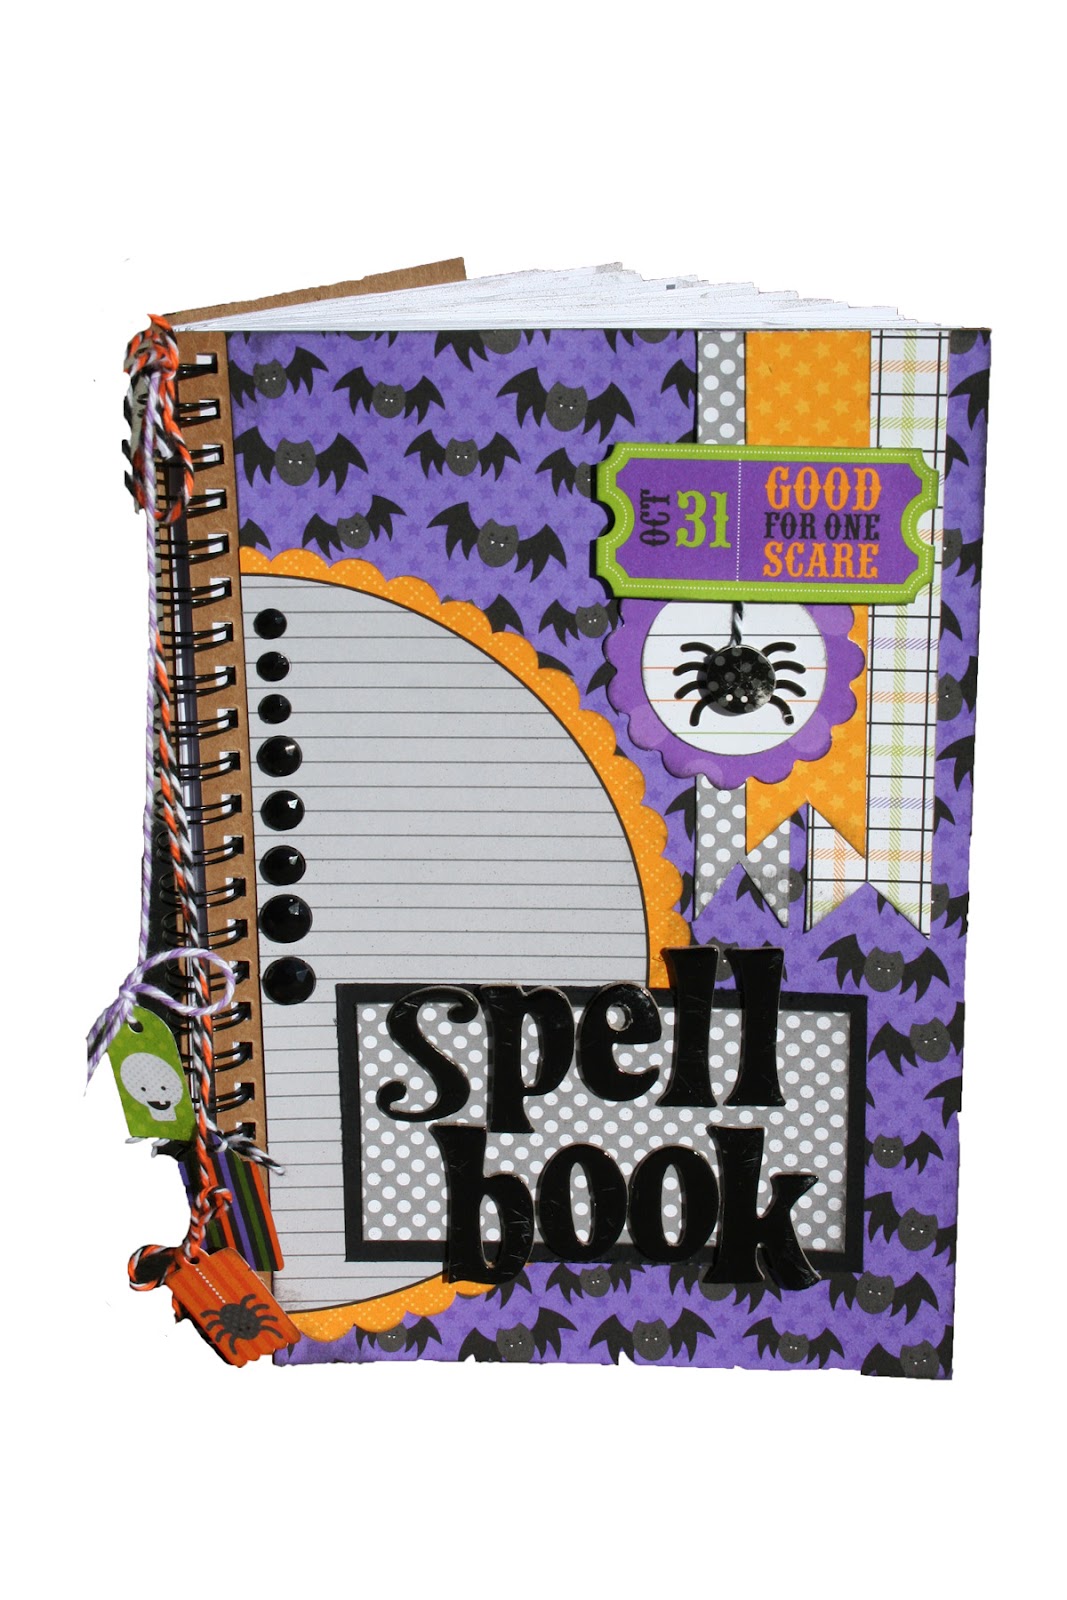
And of course no little witch can be without a cute spell book. These little books were a huge hit among the little witches. I have requests for several more.
Supplies:
5 3/4 x 81/4 kraft notebook from Craft Warehouse (only $1)
3-12 x 12 patterned papers
Mr Huey Mist
stickers-twine
Instructions:
1. Cut two pieces of patterned paper 5 1/2 x 8 1/4. Adhere one to the front and one to the back. These are a bit smaller than the cover piece. You will want to leave the spiral exposed so it will easily open.
2. Embellish the front with stickers, diecuts and scraps of pattened paper.
3. Open the notebook and crumple each piece of the inside paper. I just lightly crumpled the edges.
4. Once you've got all the pages crumpled, hold the book sideways with the pages towards you like a sandwich. Spray Mr. Huey mist along the edges lightly to give the book a distressed look.
5. Attach punched tags to twine and tie them to the top of the spiral spine with twine.
6. Have fun filling your book with toad transformation and mermaid tail spells.

Use these ideas to throw your own Halloween party and impress the little witches in your life. Thanks for having me!
Labels:
doodlebug designs,
guest designer,
holidays,
party,
scrapbooking
Guest Designer Michelle Price
Welcome this week's guest designer and Craft Warehouse Scrapbook Design Team Alumni, Michelle Price! We love Michelle's fresh and simple style including her amazing tutorials!
How long have you been crafting?
I've been papercrafting for close to 13 years.I was introduced to card making by my future sis-in law when I was 20 and thought 'Boy-what an old lady thing to do" I rolled my eyes and tried it and have been obsessed ever since. I started with rubber stamping and quickly moved on to scrapbooking and buying gorgeous patterned papers.
What inspires you to be creative?
I could say my children inspire me, but really it's the gorgeous scrap supplies that I keep buying. I also love the creative aspect of scrapbooking. Seriously though- I love to document the little things about our lives that will so soon be forgotten. It makes me happy when my kids look through my albums and read and laugh about things they've done in the past.
What Craft Warehouse products do you love to use?
Um-everything! I love that Craft Warehouse always carries the latest and greatest trendy items in the scrapbook world. The aisles and aisles of wood items waiting to be altered make me happy too!
How can you encourage others reading this column?
There really is no right or wrong way to be creative. Find something you love and use it to make something that you will cherish. Saving your favorite scrapbook paper until you find just the right project makes no sense-use it up and you will enjoy it much more!
Make sure you join us tomorrow for Michelle's Little Witch Halloween Party tutorial!
Labels:
guest designer,
scrapbooking
Spooky Blocks
Designed and Created by Sarah Owens for Craft Warehouse
Instructions:
1. Paint blocks with acrylic paint.
2. Cut paper to fit each block.
3. Glue paper to block using a Pioneer Glue Stick.
4. Add a vinyl of your choice.
Labels:
gift,
holidays,
scrapbooking
Subscribe to:
Posts (Atom)